Setting Up Webhooks in Your WordPress Plugin
After creating a webhook in Stackhook and copying its URL, paste that URL into your plugin's webhook setting using the steps below. Menu locations can shift slightly between plugin versions — if yours looks different, search your plugin's settings for “Webhook.”
WooCommerce
- WooCommerce → Settings → Advanced → Webhooks → Add webhook.
- Set Status to Active, Topic to
Order updated(this covers new orders, refunds, cancellations, and failures via status changes), and paste the Stackhook URL as the Delivery URL. - You can leave WooCommerce's own Secret field blank — Stackhook's URL already includes its own security token.
FluentCart Pro
FluentCart → Settings → Webhooks → paste the Stackhook URL and select the order events you want to send.
StoreEngine Pro
StoreEngine → Settings → Webhooks → paste the Stackhook URL for order events.
SureCart
SureCart → Settings → Webhooks → Add endpoint → paste the URL and select the events you want (purchase, refund, subscription).
Easy Digital Downloads
Enable the EDD Webhooks (or similar) extension, then add the Stackhook URL as an endpoint and choose payment/refund events.
MemberPress
MemberPress → Settings → Webhooks (under Developer Tools) → add the URL and choose transaction and subscription events.
Tutor LMS
Tutor LMS Pro → Settings → look for the Webhook/integration option and add the Stackhook URL for order/purchase events.
GiveWP
GiveWP → Settings → Webhooks (or the GiveWP Webhooks add-on) → add the Stackhook URL for donation events.
The Events Calendar / Event Tickets
Via Event Tickets' webhook/integration settings for Tickets Commerce → add the Stackhook URL for ticket order events.
Amelia
Amelia → Settings → Web Hooks → add the Stackhook URL for booking-completed and booking-cancelled events.
Note: Fluent Forms, WPForms, Ninja Forms, and Gravity Forms only offer the “New Paid Order” event, since these are general-purpose form builders rather than dedicated e-commerce plugins. Only attach the Stackhook webhook to forms that actually take payment — otherwise every plain form submission will show up in Telegram as an “order.”
Fluent Forms
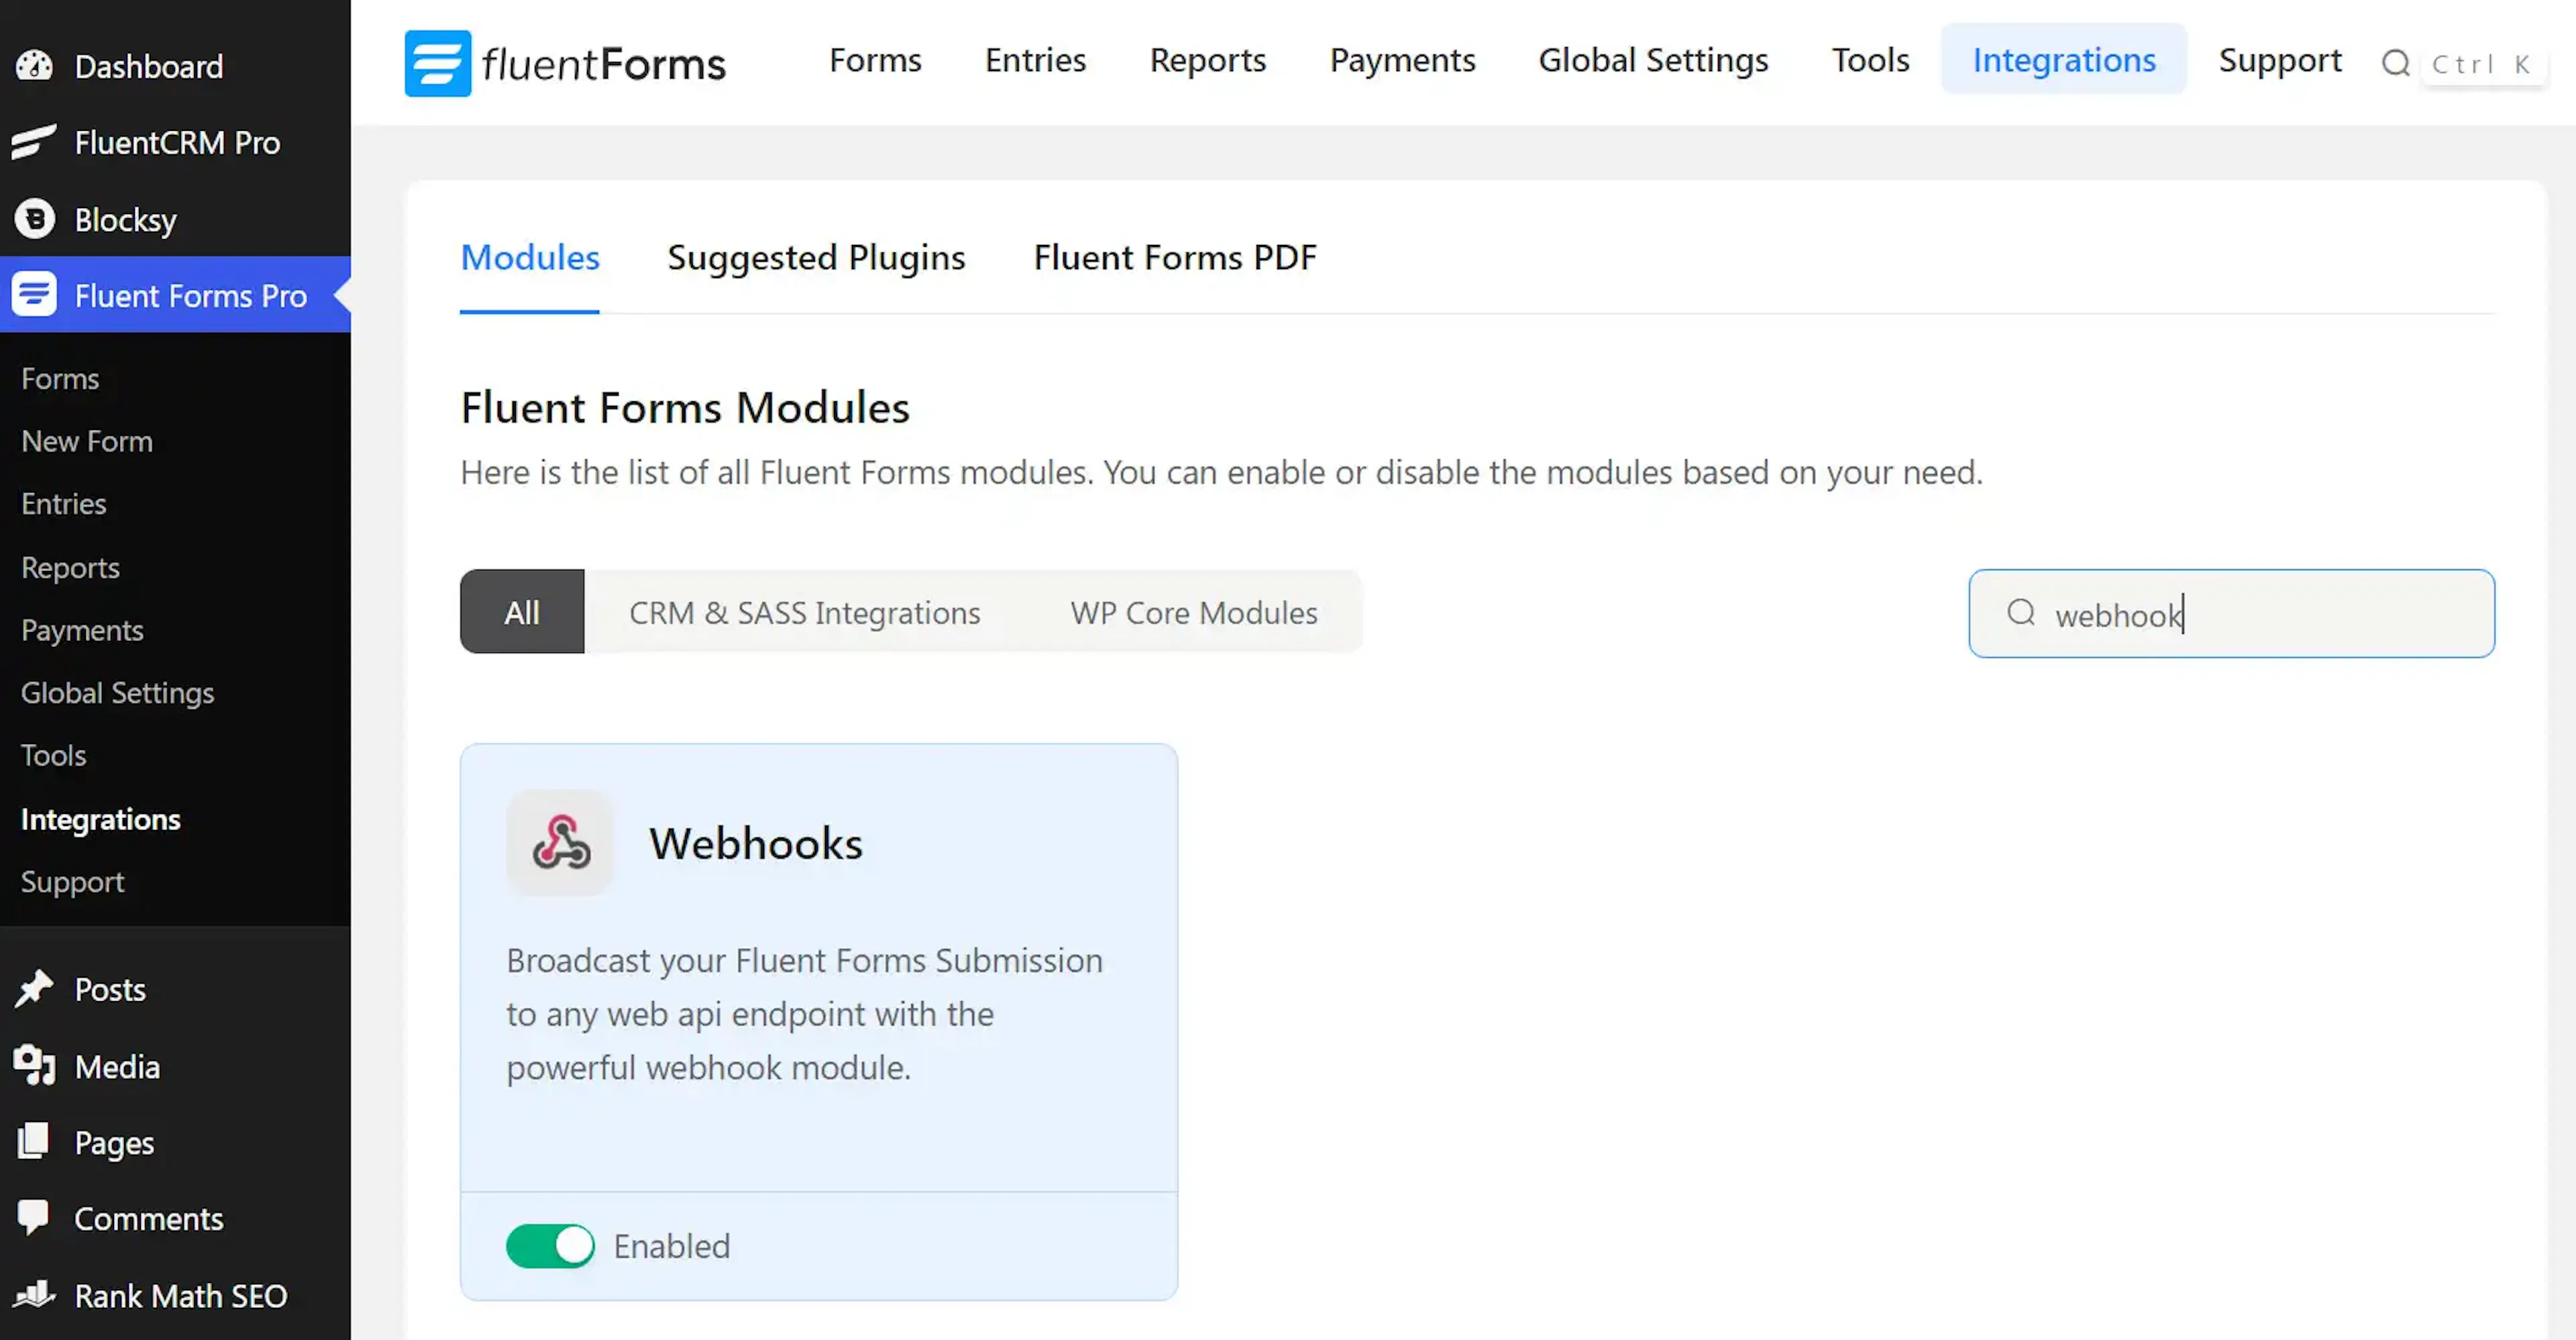
Ensure the webhook is enabled: Fluent Forms → Integrations → Enable Webhooks.
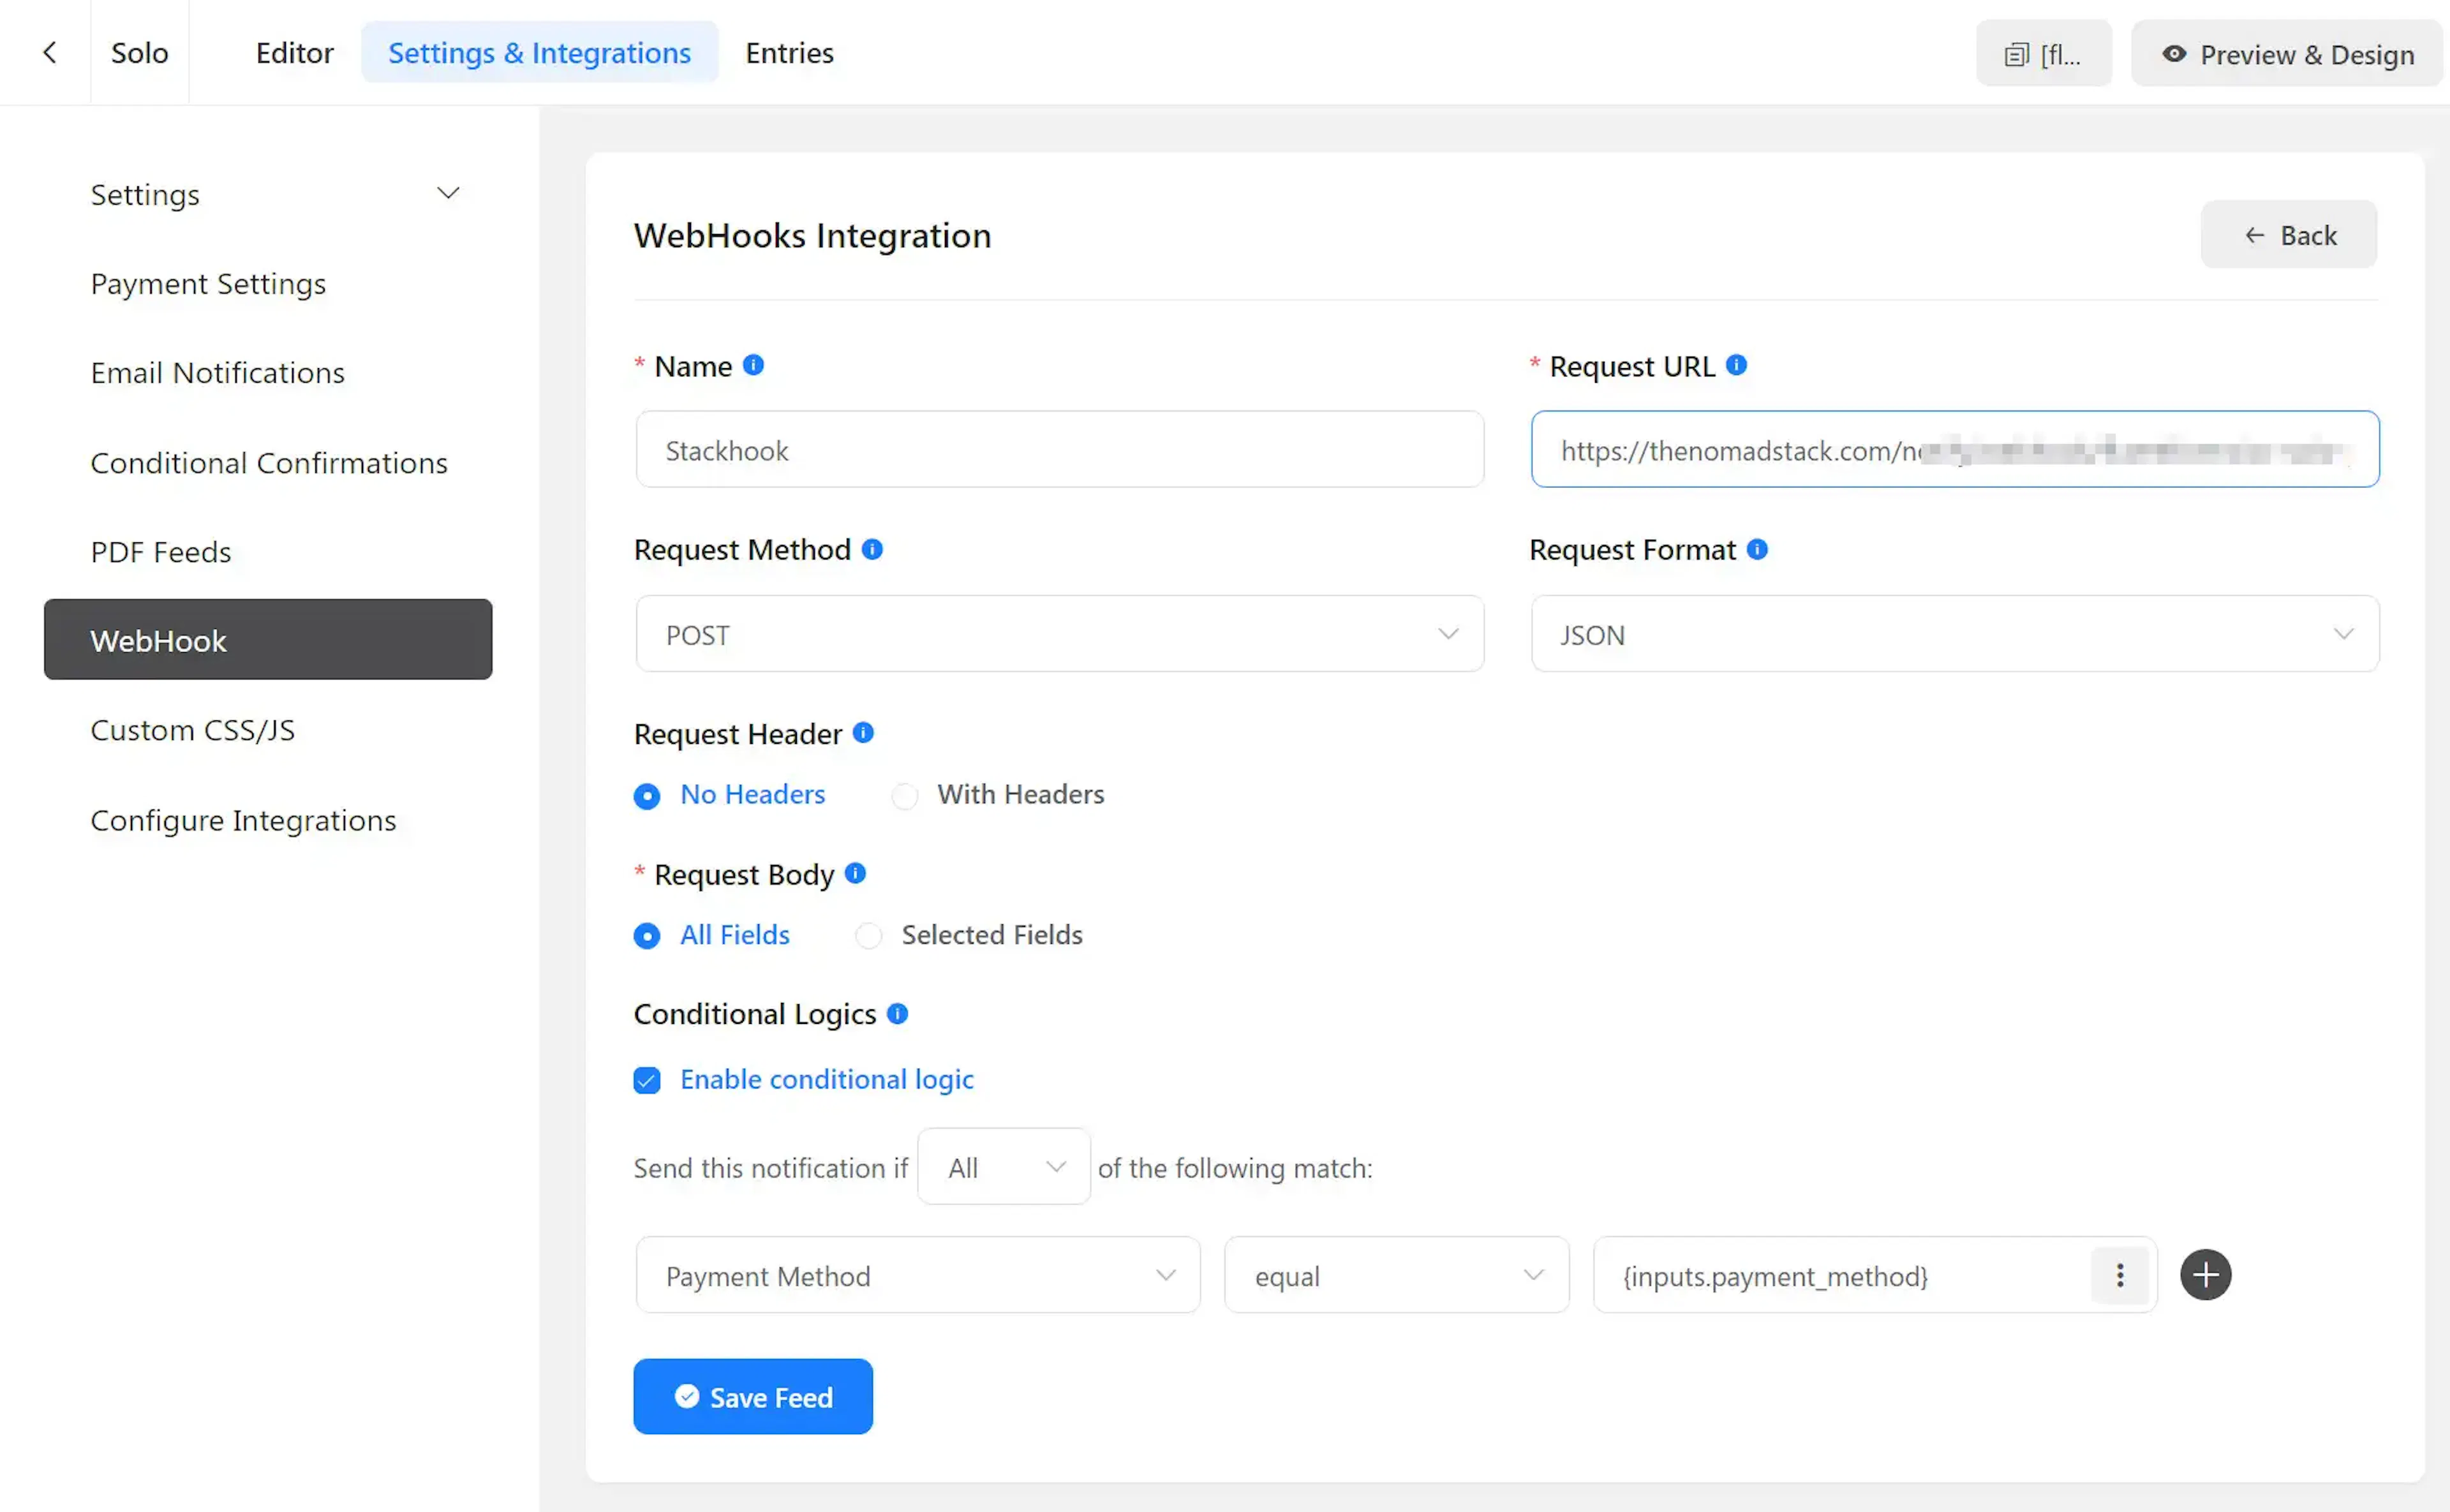
Open the form that takes payments → Settings & Integrations → Webhook → Add New → follow the settings in the screenshot below:
WPForms
Requires the Webhooks addon. Form → Settings → Webhooks → add the URL, method POST, format JSON, trigger on completed payment entries.
Ninja Forms
Requires the Webhooks add-on. Form → Emails & Actions → add a Webhook action → set the remote URL to the Stackhook URL, run it on submission of your payment form.
Gravity Forms
Requires the Webhooks Add-On. Form → Settings → Webhooks → add a feed → request URL is the Stackhook URL, method POST, body format JSON. Consider limiting the feed to only run when payment is successful.